
The gearbox, drum, and sheave form the mechanical core of any overhead crane hoist mechanism — and when any one of them fails, the entire lift stops. These three components are also where most unplanned maintenance calls originate, because their failure symptoms overlap and early warning signs are easy to misread. A grinding noise, for instance, could point to a gearbox with insufficient backlash, a drum with a worn groove, or a seized sheave starved of lubrication — three very different corrective actions.
This guide helps maintenance engineers and plant managers do two things quickly: identify which component is failing based on what they are seeing or hearing, and know the exact wear threshold at which replacement is no longer optional. For teams evaluating suppliers or spare-part sourcing, the compliance section at the end covers the certification documents worth requesting before a part ships.
Diagnose the Fault First: Symptom Quick-Reference
Before pulling tools, match the symptom to the component. The table below maps observable signs to the most likely source and the urgency level.
| What you are seeing or hearing | Most likely component | Urgency |
|---|---|---|
| Periodic gear chatter / vibration on driven gear | Boîte de vitesses | ⚠️ Inspect soon |
| Loud metallic rubbing, housing rattles | Boîte de vitesses | 🔴 Stop crane now |
| Uneven knocking during meshing | Boîte de vitesses | 🔴 Stop crane now |
| Bearing housing overheating | Boîte de vitesses | 🔴 Stop crane now |
| Oil leaking from split face | Boîte de vitesses | ⚠️ Inspect soon |
| Reducer vibrating on base | Boîte de vitesses | ⚠️ Inspect soon |
| Overall gearbox running hot | Boîte de vitesses | ⚠️ Inspect soon |
| Visible crack on drum body | Tambour | 🔴 Stop crane now |
| Rope jumping or skipping grooves | Drum / Sheave | 🔴 Stop crane now |
| Drum shaft or key wear | Tambour | 🔴 Stop crane now |
| Uneven groove wear across sheave | Sheave | ⚠️ Inspect soon |
| Sheave will not rotate freely | Sheave | ⚠️ Same shift |
| Sheave tilting or loose on shaft | Sheave | 🔴 Stop crane now |
| Cracked or broken sheave flange | Sheave | 🔴 Stop crane now |
A 🔴 rating means the crane should not lift another load until the fault is addressed. These are not conservative recommendations — they reflect the failure modes that have led to load drops and fatalities in documented incidents.
Gearbox (Reducer) Faults
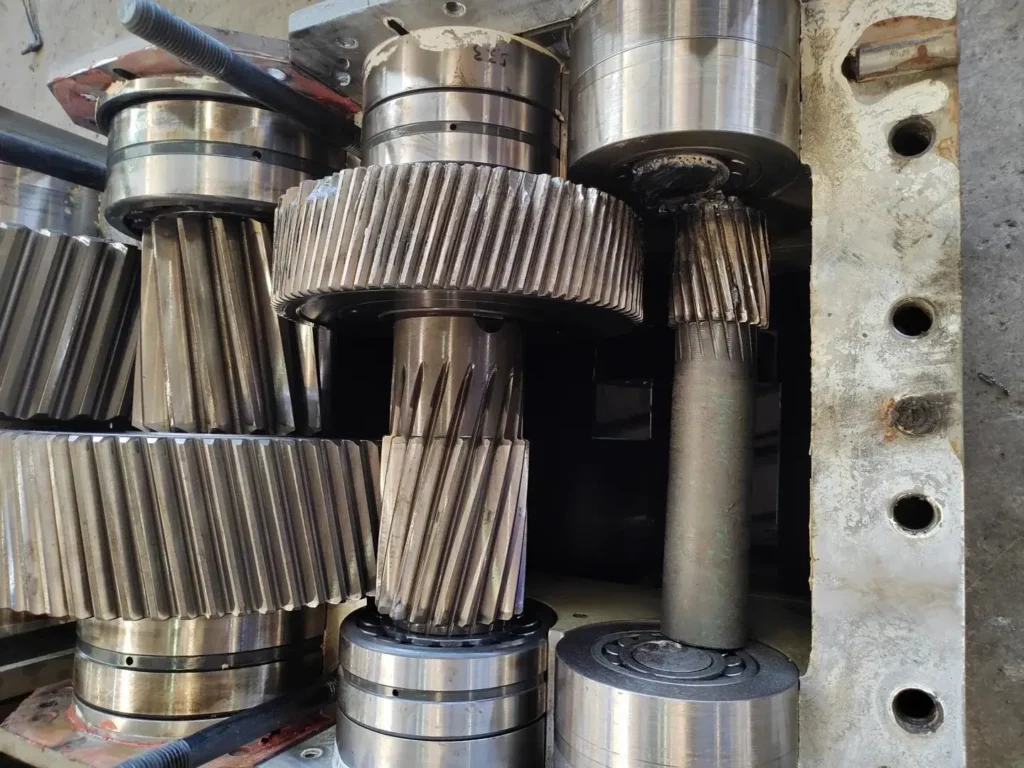
Le gearbox converts motor speed to the torque required for hoisting, and it does so under cyclic load reversals every time the hook lifts and lowers. Most gearbox faults in overhead cranes fall into three clusters: noise and vibration from gear mesh problems, thermal issues from lubrication failures, and oil leaks from housing or seal degradation.
Noise and Vibration Faults
Periodic gear chatter — especially pronounced on the driven gear — almost always indicates excessive pitch error or out-of-tolerance backlash. The driven gear is absorbing load on every mesh cycle; when the pitch spacing is inconsistent, it impacts rather than rolls through engagement. The fix is geometric: repair or replace the gear pair and re-install to manufacturer backlash specification.
Severe metallic rubbing combined with housing rattle is a different and more urgent pattern. Here the gear backlash is typically too small rather than too large — the teeth are fighting each other rather than rolling cleanly. Contributing causes include non-parallel gear shafts or sharp burrs on tooth tips from manufacturing or previous wear. This condition accelerates rapidly; continued operation will scrap the gear set. Stop the crane, replace or re-mesh the gears, and verify shaft parallelism before restart.
Uneven knocking during meshing — irregular rather than periodic — points to a tooth surface defect causing the gear to contact on one corner of the tooth face rather than across the full working width. This is a replace-the-gear situation; the defective contact pattern cannot be corrected by adjustment.
Overheating and Oil Leaks
Bearing housing overheating is the most structurally dangerous gearbox symptom because it often precedes bearing seizure. The most common causes, in order of frequency, are lubricant starvation (the oil level has dropped below the minimum, often from an undetected leak), contaminated lubricant (water or particulate ingress), bearing wear from previous overload events, and shaft journal seizure from misalignment. When housing temperature exceeds normal operating range — typically more than 30–40 °C above ambient for standard industrial reducers — stop the crane, inspect lubricant level and condition first, then bearing condition.
Overall gearbox overheating without localized hot spots is the opposite problem: too much lubricant. Excess oil causes churning losses, which generate heat throughout the housing. Drain to the manufacturer’s specified level; most crane gearboxes are marked with a sight glass or dipstick at the correct fill height.
Oil leaking from the split face typically has one of four causes: seal failure, housing deformation, an uneven split face from improper assembly, or loose connecting bolts allowing the joint to breathe under load. The corrective sequence is seal inspection first, then bolt torque, then split face flatness. Severely deformed housings need replacement; lightly uneven faces can be scraped flat and the oil return groove cleared.
A gearbox vibrating on its base is rarely a gearbox problem — it is usually a mounting problem. Loose anchor bolts are the first check; misaligned shaft connections (excessive angular or offset error at the coupling) are the second. Base rigidity matters: a soft foundation amplifies vibration that would otherwise damp out, and that vibration accelerates gear and bearing wear over time.
Drum Faults
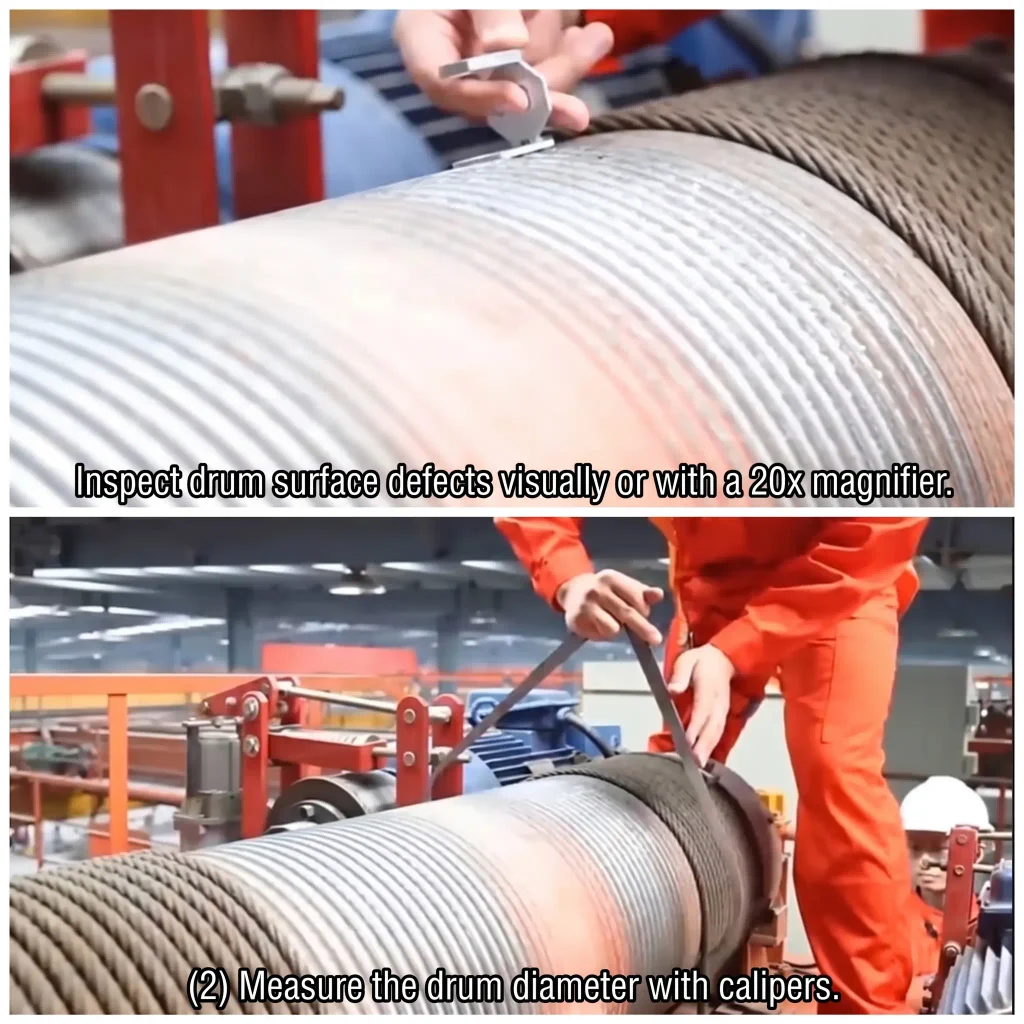
The drum is the component most directly stressed by the wire rope under load. Its wall takes the rope’s radial force across every groove, and its shaft transmits the full hoisting torque. Drum failures are among the highest-consequence events in a crane’s hoist mechanism because a catastrophic drum failure can release the load without warning.
Cracks and Wall Wear
A crack in the drum body is an immediate stop-use condition with no repair option — the drum must be replaced. Drum cracks are typically fatigue-driven: the cyclic tensile stress from rope winding exceeds the material’s endurance limit, usually after a combination of extended service life and overload events. Cast-iron drums are particularly susceptible because the material has low tensile ductility; steel-plate welded drums give more warning before cracking.
Wall wear is the slower failure mode. As the drum groove wears from rope contact, the remaining wall thickness decreases and the groove geometry changes, which in turn accelerates rope wear. The replacement threshold under JB/T 9006 is when groove wall wear reaches 15–20% of the original wall thickness. Below this, the structural margin is insufficient; above it (i.e., at smaller wear values), re-lubrication of the rope and regular measurement are the appropriate response.
Shaft and Key Wear
Drum shaft and key wear is a maintenance failure more than a design failure — it almost always results from inadequate inspection intervals. The shaft transmits torque through the key into the drum, and fretting wear at the key contact surfaces is progressive. Once started, it accelerates: the loosened key allows micro-movement, which generates debris, which causes further wear. The replacement criterion for drum shaft wear is 5% of nominal shaft diameter — beyond that, the risk of shaft shear and sudden load drop is unacceptable. Stop use immediately; inspect and replace the shaft-key assembly.
Rope Jump (Skipping Grooves)
Rope jumping out of the drum groove is an operational fault before it becomes a mechanical one. The most common root cause is improper lowering: when the hook is lowered past the minimum rope reserve (typically two to three dead wraps), the rope can go slack and lose its groove tracking. On the next hoist, it spools over the groove shoulder rather than into it. The corrective action is correct operation — never over-lower the hook. If groove wear has already progressed to the point where the rope exits under normal operation, the drum needs replacement.
Sheave Faults
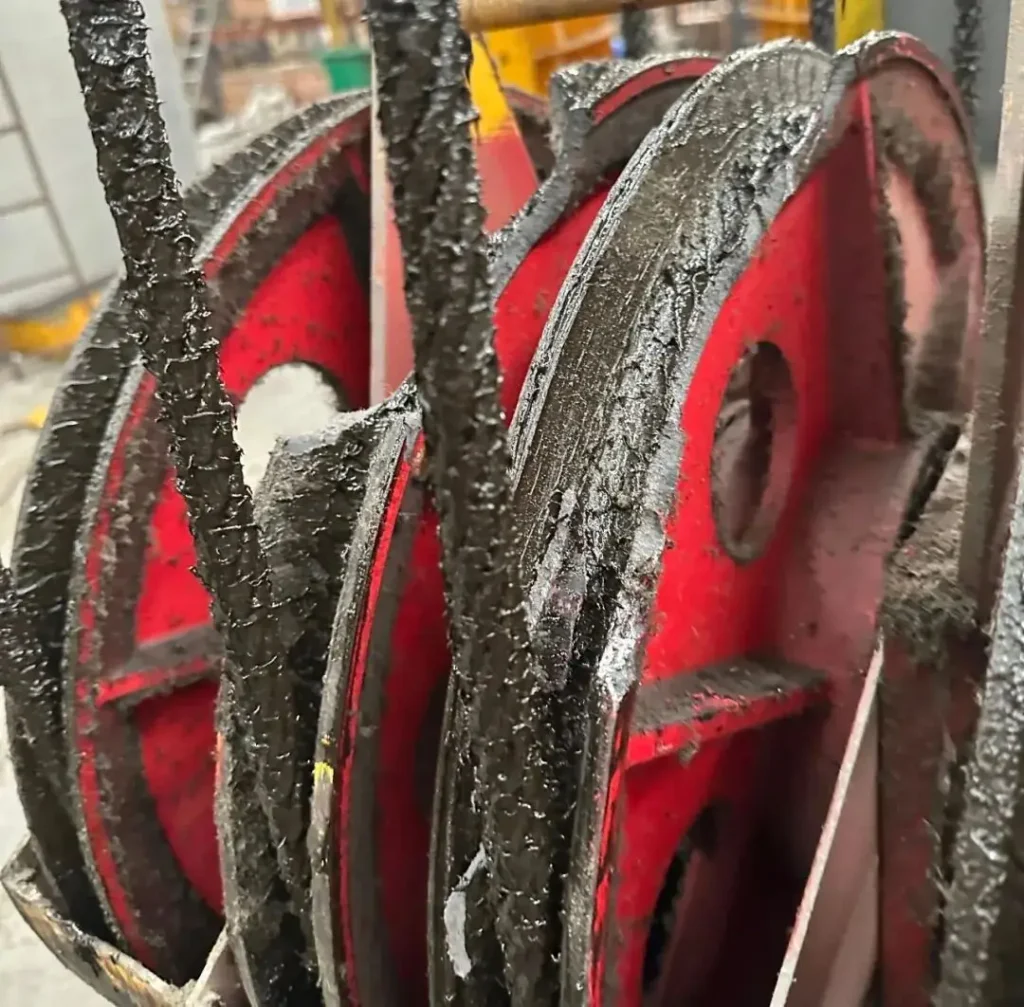
Sheaves redirect and multiply the wire rope force in the reeving system. A fixed (dead) sheave changes rope direction; a moving sheave reduces the line pull required. In either role, the sheave groove is in continuous sliding and rolling contact with the rope, and the shaft bearing supports the sheave’s full rope load. Sheave failures are often slow to develop but fast to worsen once the groove geometry degrades — because a worn groove then accelerates rope wear, creating a compounding problem.
Groove Wear and Replacement Thresholds
Uneven groove wear across the sheave face is caused by non-uniform material hardness, improper rope-to-groove alignment, or installation error that places the rope at an angle to the groove centerline (fleet angle violation). The groove wall wears at different rates across its width, and the rope eventually rides on the high side, increasing contact stress.
The replacement thresholds are specific and should be measured rather than estimated:
- Groove wall wear reaching 1/10 of the original wall thickness → replace sheave
- Radial (depth) wear reaching 1/5 of the rope’s nominal diameter → replace sheave
These values reflect the point at which the groove can no longer properly support the rope’s helical structure. A rope running in an undersized groove is pinched; a rope running in an oversized worn groove is unsupported and flexes internally at every wrap, accelerating fatigue wire breaks.
Seized or Tilted Sheave
A sheave that will not rotate freely is almost always a lubrication failure. The shaft bearing — whether plain or rolling element — has either run dry or become contaminated. The diagnosis is straightforward: if the sheave is stationary while the rope moves, the rope is sliding rather than rolling across the groove, which multiplies wear by an order of magnitude. On a production crane, a seized sheave can wear through a rope in a fraction of its normal service life. The fix is to clean, inspect, and re-lubricate the bearing — or replace it if the races are scored.
Sheave tilting or looseness on the shaft points to a failed shaft retainer or a rope that has jumped the groove and is forcing the sheave sideways. Both conditions need immediate correction; a tilted sheave places bending stress on the shaft that it is not designed to carry, and side loading on sheave flanges is the primary cause of flange cracking (see below).
Cracked or Broken Flange
A cracked or broken sheave flange is a replace-immediately condition. Sheave flange cracks are caused by impact loading (sudden shock from a snagged rope or two-blocking event) or by cumulative fatigue from repeated side loading. The WorkSafe Queensland incidents in 2019 and 2014 both involved sheave failures under loads within the crane’s rated capacity — in one case, the failure was attributed to side loading from an incorrectly rigged rope; in the other, pre-existing damage was not detected during pre-start inspection. Neither sheave was operating beyond its rated load. This is why visible crack inspection before each lift matters: sheave failures do not always wait for overload conditions.
Wear Limits & Replacement Criteria: Speed Reference
All thresholds in one place for field reference.
| Composant | Measurement | Replace When |
|---|---|---|
| Drum wall | Groove wall thickness | Wear ≥ 15–20% of original wall thickness |
| Drum shaft | Shaft diameter | Wear ≥ 5% of nominal diameter |
| Sheave groove wall | Wall thickness at groove | Wear ≥ 1/10 of original thickness |
| Sheave groove depth | Radial wear | Wear ≥ 1/5 of rope nominal diameter |
| Sheave shaft | Shaft diameter | Wear ≥ 3–5% of nominal diameter |
| Gearbox gear teeth | Tooth thickness | Wear ≥ 15–25% of original thickness |
| Gearbox gear tooth surface | Spalling area / depth | Spalling covers ≥ 30% of working area, or depth ≥ 10% of tooth thickness |
For hoist mechanism components specifically (drum, sheave, gearbox output shaft), repair is generally not an acceptable alternative to replacement when wear limits are exceeded — the risk profile for a load-bearing component in a hoisting application is different from a travel mechanism, where a weld repair or re-machined keyway may be acceptable after engineering assessment.
Certification & Compliance
Procurement teams importing overhead cranes or replacement components should verify the following before accepting delivery. Certification is not a paperwork formality — it is the mechanism by which the design and manufacturing process has been independently validated against the failure modes described in this guide.
What to request from the supplier:
The crane or component should be supplied with an Déclaration de conformité CE (for CE-marked equipment destined for EU or CE-recognition markets), confirming conformance with the EU Machinery Directive 2006/42/EC. For the hoist mechanism specifically, the relevant design standard is FEM 1.001 (European federation of materials handling) for duty classification and component sizing, or ISO 4301 for crane classification. Gearboxes in the hoist mechanism are typically designed and selected against FEM duty class criteria.
For the manufacturer’s quality system, request an Certificat ISO 9001 covering the facility and product scope. This confirms that the manufacturing and inspection process — not just the design — is under documented control.
For North American installations, ASME B30.2 governs overhead and gantry crane operation and inspection requirements, including inspection frequency and discard criteria for the wire rope and hook. OSHA 29 CFR 1910.179 sets the regulatory baseline for crane inspection in US general industry.
For EAC-market (Eurasian Economic Union) destinations, an EAC Declaration of Conformity is required before customs clearance.
The practical verification step: ask the supplier for the actual documents, not a statement that the crane “meets” a standard. A crane that meets CE requirements has a signed EC Declaration of Conformity with the specific directive references, a technical file, and a conformity assessment trail. A verbal assurance does not.
Conclusion

Alan
Spécialiste des solutions de grue · Voitto Crane
Spécialisés dans les solutions d'exportation de ponts roulants, portiques, grues à flèche, grues portuaires et ponts roulants. Plus de 10 ans d'expérience dans l'accompagnement de clients internationaux : conseils avant-vente, choix de la capacité et configurations sur mesure.
Most gearbox, drum, and sheave failures follow a pattern: a minor symptom that could be caught at inspection becomes a mechanical fault that stops production, and in the worst cases becomes a safety event. The symptom table at the top of this guide is the fastest route to correct diagnosis. The replacement thresholds in the speed-reference table remove the ambiguity from the replace-or-monitor decision.
If you are sourcing replacement components or a new crane hoist mechanism, confirm the supplier’s FEM duty class documentation, request the EC Declaration of Conformity, and verify ISO 9001 coverage of the manufacturing facility — before the order ships, not after.
FAQ
Q1: What is the most dangerous gearbox fault on an overhead crane hoist?
Bearing housing overheating is the highest-urgency gearbox fault because it precedes bearing seizure — a seized bearing can cause shaft lockup or sudden gearbox failure under load. Unlike gear noise, which usually develops gradually, bearing failure can accelerate from warning signs to catastrophic failure within hours of operation. Stop the crane and inspect lubricant level and bearing condition before resuming any lift.
Q2: Can a cracked drum be repaired by welding?
No — not on a hoisting mechanism. A crack in a hoist drum means the component has exceeded its fatigue life or experienced overload damage, and welding does not restore the original material properties or geometry at the crack root. The drum must be replaced. Weld repair may be acceptable for travel-mechanism structural components after engineering assessment, but not for a load-bearing hoist component.
Q3: How do I know if my crane sheave groove needs replacement, not just lubrication?
Use a sheave gauge or direct measurement. If groove wall thickness has reduced by more than 1/10 of the original dimension, or if the radial wear depth exceeds 1/5 of the rope’s nominal diameter, the sheave should be replaced regardless of lubrication condition. A worn groove that has degraded past these thresholds cannot properly support the rope’s helical structure; lubrication will not correct that geometry.
Q4: How often should gearbox, drum, and sheave be formally inspected?
Under ASME B30.2 (US) and equivalent standards, frequent inspections (visual, by the operator) should occur before each shift. Periodic inspections by a qualified mechanic are required at intervals of 1–12 months depending on service class — cranes in continuous heavy-duty service need the shorter interval. Specifically for the drum, sheave, and gearbox: measure groove and wall dimensions at each periodic inspection, not just visual checks. Dimension trending over multiple inspections is more informative than any single measurement.




 English
  Español
  Português
  العربية
  Français
  Русский